A Crash Course: Building Your First Study
Written by Ting Qian
Ting Qian is the President and Founder of FindingFive. He created a set of scripts for running online studies during graduate school, which has gradually evolved into the current FindingFive platform over the last decade.
FindingFive allows us to quickly and easily design experiments for deployment on the web. In this crash course, we will take a detailed tour through some of FindingFive’s features by designing a simple memory study: a modification of Craik and Tulving (1975). We recommend following through this example carefully before creating your own experiment.
This crash course focuses on building a very simple experiment in order to jumpstart your FindingFive experience, but FindingFive can do so much more! To learn more about what FindingFive can do, check out the Study Grammar Documentation and our other study guides, which show how to implement popular experimental paradigms on FindingFive, such as memory recall, priming, or self-paced reading.
Have you viewed our other tutorials?
This crash course dives directly into using the JSON-based FindingFive Study Grammar to build a simple experiment. If you haven't already, consider checking out our tutorials on Understanding JavaScript Object Notation (JSON) and Introduction to the FindingFive Study Grammar.
Introduction
In our sample experiment, participants will first view word pairs (training) and later complete two-alternative forced choice (2AFC) and recall tasks (testing). Some pairs of words will be semantically congruous, while others will be semantically incongruous. We expect that semantically congruous word pairs are recognized and recalled more quickly and accurately than semantically incongruous word pairs during the testing phase of the experiment.
To build this experiment, we must therefore:
- Define
stimuliwhich will include our training and test instructions to the participant, the word pairs that the participant must learn during our training phase, and the test questions we will ask the participant to respond to; - Define
responsesfor the test phase of the experiment, both 2AFC and free recall; - Define
trial_templatesfor each set of trials in our study (instruction trials, training trials, 2AFC test trials, and free recall test trials); - Define the
procedure, which will consist of a training block and then a testing block.
Getting Started
If you haven't already, sign up for a Researcher account and navigate to the "Studies" page via the "Research" menu. Click on the "New Blank Study" template on the right, and then the "Create a New Study" button below.
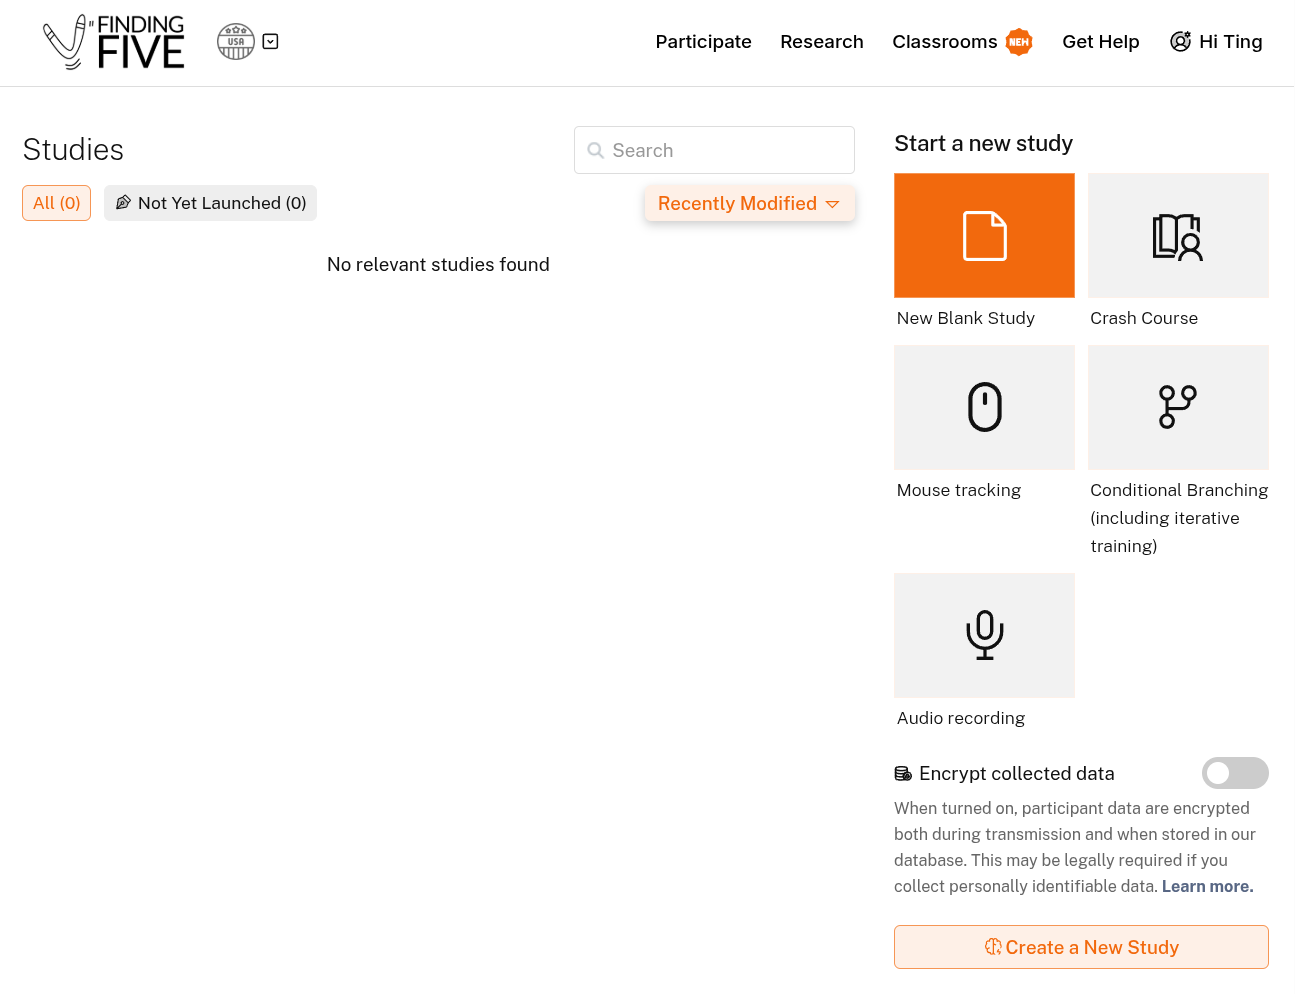
Creating a new study in FindingFive.
Isn't there already a "Crash Course" template?
FindingFive has several study templates which include prefilled boilerplate material. However, we will use a blank study template here so that you can learn to create a study from scratch.
Once you've done that, you will see the FindingFive study editor page, which should look something like this:
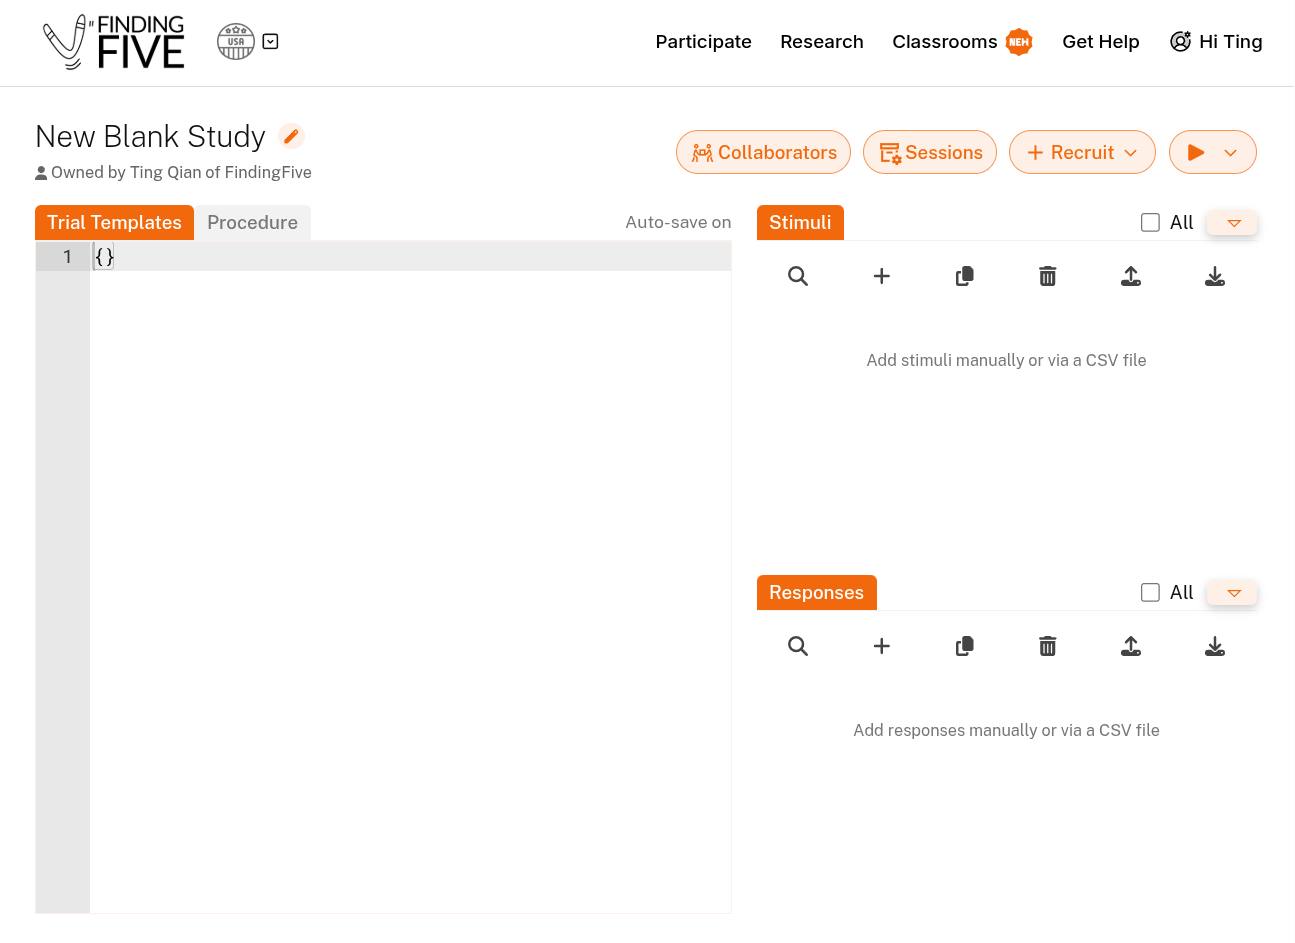
The study editor page in FindingFive.
Name your study
We should give our study a new name! This name is how we will find this study later in our list of studies. To change the study name, we click the editing icon to the right of "New Blank Study", and enter "Crash Course".
Quick tour of the editing UI
A FindingFive study is created by defining four components that should sound intuitive to those of us with some training in experimental design: stimuli, responses, trial templates, and procedure. These four components are defined here on our study editor page.
On the right-hand side of this page, we can search, add, import, and export the definitions of stimuli and responses. These make up the basic building blocks of any study.
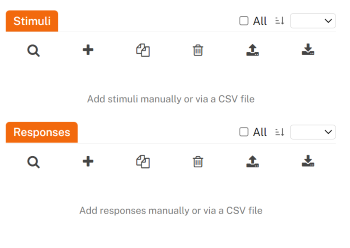
The study editor interface for managing stimuli and responses.
On the left-hand side of the screen, the code editor is split into two tabs (if you have a screen that is wide enough, they will be listed side-by-side instead of only one at a time). Under the first tab, we can create trial templates, which combine stimuli and responses to form trials; under the second tab, we can create the procedure, which defines how trial templates are organized into blocks and then presented. These are the two components that involve some coding (but rest assured that we will walk you through it!).
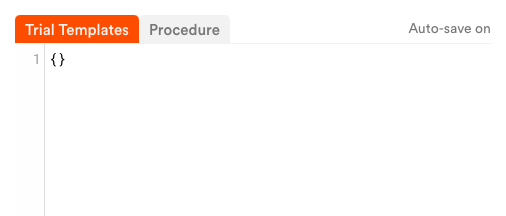
Defining trial templates and procedures in the code editor.
Coding Basics
FindingFive uses a programming-like language called JavaScript Object Notation (JSON). If you are new to JSON, please rest assured it's easy to learn! Check out our JSON tutorial to get started.
Creating Stimuli
Let's build our experiment from the ground up, starting with the stimuli. Stimuli are items that are presented to the participant, and they can be text instructions, audio clips, images, and videos. For our experiment, we need to define stimuli for both our training and test instructions, each of our word pairs and test questions, and a concluding statement to the participant at the end of the study.
Manual Stimulus Creation
We'll start by defining the text stimulus for the training instructions. To add a new stimulus to our study, click the + button under the Stimuli menu in the left sidebar. A new window will pop up, asking for the name and the definition of the stimulus:
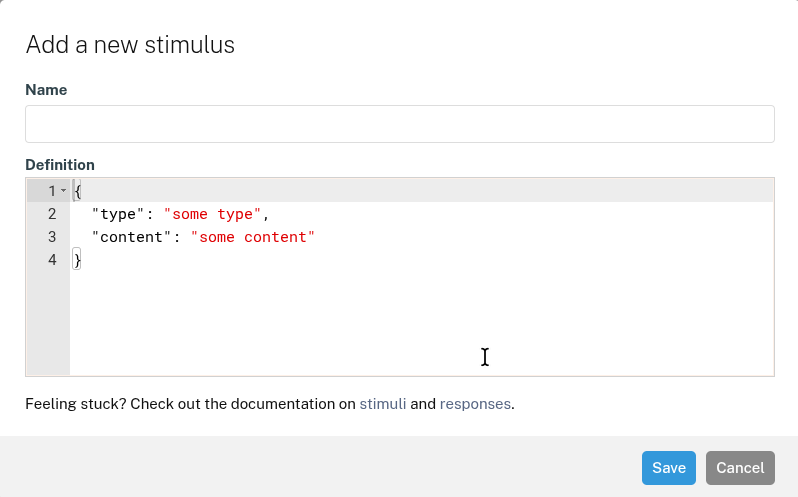
Adding a new stimulus manually in FindingFive.
We will type TrainingInst into the name field, paste the following code (make sure to use the "copy to clipboard" icon in the code block below to copy just the code itself, without the inline explanations) into the definition field, and click Save:
- Every stimulus must have a recognized
"type". In this case,"text"(required). - Every stimulus must include
"content". In this case, the training instructions (required). - Setting
"alignment"to"center"ensures the stimulus is displayed in the center of the screen (optional, defaults to"left"). - Lines in a code block such as this are separated from each other by commas, but the last line before the closing curly brace
}has no comma.
Make sure to scroll the code block all the way to right to see the complete stimulus definition.
Note
We can use HTML tags (like <b></b> for bold font) to alter the appearance of our text stimulus. But links like <a href=""></a> are not supported for security reasons.
As an exercise, let's add a second stimulus named TestInst, which has the following definition:
- Every stimulus must have a recognized
"type". In this case,"text"(required). - Every stimulus must include
"content". In this case, the test instructions (required). - Setting
"alignment"to"center"ensures the stimulus is displayed in the center of the screen (optional, defaults to"left").
Congratulations! You have successfully added the first two stimuli of your study. They should now be displayed in the Stimuli sidebar.
Batch Stimulus Upload
Next, let's create stimulus definitions for each of the words to be presented in the training phase of the experiment. Doing so individually can be quite tedious. Fortunately, FindingFive supports batch uploading of stimuli via a CSV file, which makes life much easier when we are dealing with potentially hundreds of stimuli.
To get started, we hover our mouse over the batch upload button under Stimuli, and a brief explanation on how to format stimulus definitions in the CSV will pop up:
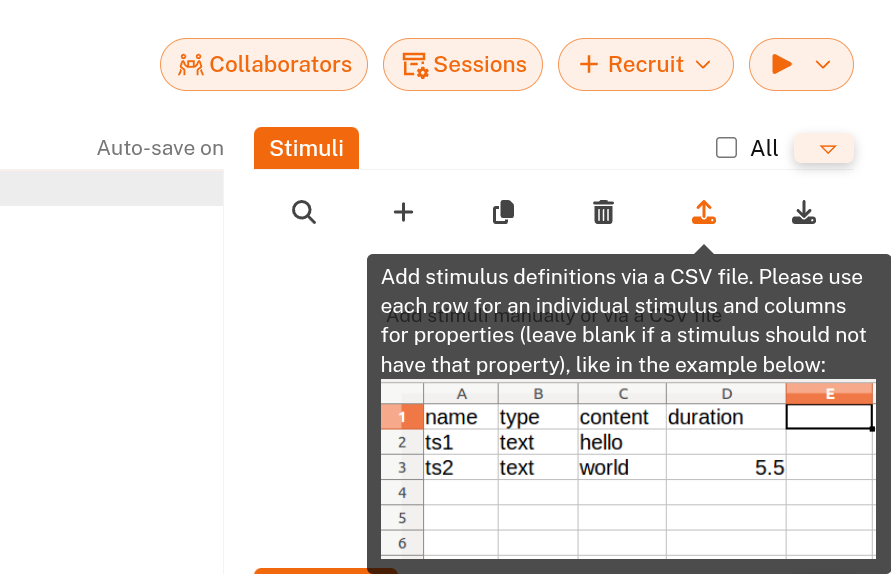
Batch uploading stimuli via CSV in FindingFive.
For our current example, Craik and Tulving (1975), you can use your favorite spreadsheet software (Excel, Google Sheets, or other great programs) to create a CSV file that looks like the table below. Alternatively, you can just download the pre-made CSV file directly.
Warning
Be sure to save your file as CSV (comma separated values) format, instead of a proprietary format used by Microsoft Excel or other spreadsheet software.
| name | type | content | alignment |
|---|---|---|---|
| ConCue1 | text | player | center |
| ConTarget1 | text | BALL | center |
| ConCue2 | text | smooth | center |
| ConTarget2 | text | HARD | center |
| ConCue3 | text | furniture | center |
| ConTarget3 | text | CHAIR | center |
| ConCue4 | text | fire | center |
| ConTarget4 | text | COLD | center |
| InconCue1 | text | fruit | center |
| InconTarget1 | text | FLOWER | center |
| InconCue2 | text | moth | center |
| InconTarget2 | text | FOOD | center |
| InconCue3 | text | cheese | center |
| InconTarget3 | text | GREEN | center |
| InconCue4 | text | cave | center |
| InconTarget4 | text | WET | center |
| ConTest1y | text | Was <b>ball</b> the word paired with <b>player</b>? | center |
| ConTest1n | text | Was <b>tennis</b> the word paired with <b>player</b>? | center |
| ConTest2y | text | Was <b>hard</b> the word paired with <b>smooth</b>? | center |
| ConTest2n | text | Was <b>soft</b> the word paired with <b>smooth</b>? | center |
| InconTest1y | text | Was <b>flower</b> the word paired with <b>fruit</b>? | center |
| InconTest1n | text | Was <b>bloom</b> the word paired with <b>fruit</b>? | center |
| InconTest2y | text | Was <b>food</b> the word paired with <b>moth</b>? | center |
| InconTest2n | text | Was <b>eat</b> the word paired with <b>moth</b>? | center |
| ConTest3 | text | What was the word paired with <b>furniture</b>? | center |
| ConTest4 | text | What was the word paired with <b>fire</b>? | center |
| InconTest3 | text | What was the word paired with <b>cheese</b>? | center |
| InconTest4 | text | What was the word paired with <b>cave</b>? | center |
| BreakInst | text | Please take a short break | center |
You'll notice in our CSV that the first 16 rows are the training stimuli, followed by the stimuli for the test trials. For the test trials, our "stimuli" are just the questions we'll show to participants to prompt their responses. We recommend picking good names for your stimuli and responses so they're easy to keep track of in the lists. This also makes data analysis easier later on, since those names will show up in your results files.
Let's upload this CSV and create all those stimuli at once!
We click the batch upload button and pick the CSV file from our computer. For this example, it should upload super quick—just a second or two. But if you're uploading hundreds of stimuli, it might take a couple of minutes depending on your computer and internet speed. Please be patient and don't refresh the page unless you're sure something went wrong. Once it's done, we should see our Stimuli sidebar filled up with all our new stimuli!
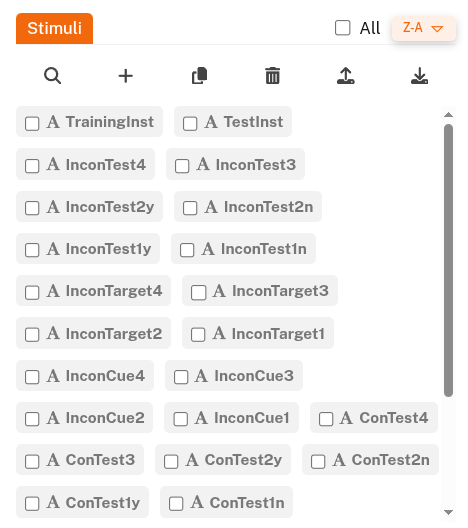
Stimuli sidebar after batch upload.
Note
Even though we're just using simple text stimuli in this crash course, you can batch upload other types of stimuli the same way. The columns in your CSV describe the properties of each stimulus, and each row creates a new stimulus for your study.
Creating Responses
Responses define participant interactions and data collection. For our memory study, we'll create choice responses for recognition (2AFC) tests—handling YES/NO for correct/incorrect word pairs—and a text response for free recall. To add a response, click the + button under Responses in the sidebar, similar to what we have just done for adding stimuli in the above section.
Let’s create the first choice response for YES-target trials (i.e., correct matches). Name it 'TestResponseTargetY' and paste the following code into the definition field and save.
| The "TestResponseTargetY" response (click + for code explanations) | |
|---|---|
- Every response must have a recognized
"type". In this case,"choice"(required). - The
"choices"property lists the response options, encased in square brackets[](required). - The
"key_mapping"property maps choices to keyboard keys for faster responses (optional). - Setting a
"target"identifies the correct answer for automatic accuracy scoring in your data (optional).
Info
The key mapping (F for YES, J for NO) speeds up reaction time measurement, ideal for recognition tests.
For NO-target trials (i.e., incorrect pairs), we can duplicate this YES-target response (there's a button for that), rename the new duplicate 'TestResponseTargetN', and change the "target" value to "NO". Give this a try yourself!
Spoiler! Code for ''TestResponseTargetN''
| The "TestResponseTargetN" response (click + for code explanations) | |
|---|---|
- Every response must have a recognized
"type". In this case,"choice"(required). - The
"choices"property lists the response options, encased in square brackets[](required). - The
"key_mapping"property maps choices to keyboard keys for faster responses (optional). - Setting a
"target"identifies the correct answer for automatic accuracy scoring in your data (optional).
Now, we need to add the text response for free recall. Click the + button again, name it 'FreeRecall', and paste the code below.
| The "FreeRecall" response (click + for code explanations) | |
|---|---|
- Every response must have a recognized
"type". In this case,"text"(required). - Setting
"max_char"limits input length to prevent overly long responses (optional).
And that’s it! We are all set with the responses! A total of 3 responses should now appear in the Responses sidebar. Next, we’ll organize these responses, together with the stimuli we have added, into trial templates.
Creating Trial Templates
Now that we have the stimuli and responses, we can set up the trial templates that define the organizational logic of our trials. We define a single trial template for each type of trials in our study—instruction trials, randomized training trials, randomized 2AFC test trials, and randomized free recall test trials—. Each trial template then generates multiple trials with specific randomization techniques. We will see how this setup makes it easy to create many trials without tediously repeating the same code over and over again.
Trial templates are defined in the "Trial Templates" tab of the code editor. Make sure that tab is selected (the selected tab is orange).
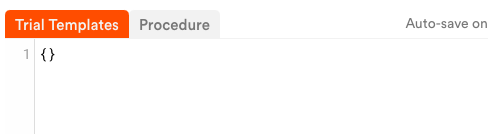
The Trial Templates code editor tab.
Instruction trials
First, let’s set up our instruction trials. The following code segments need to be inserted inside the curly braces on the initial code editor screen. We’ll skip showing you these outermost curly braces until the end of this section, when we’re done putting all of our code segments together.
First, we’ll create an instruction trial T1 to explain the training trials to participants. This basic trial template presents the training instructions for 10 seconds before allowing participants to continue:
| The "T1" instruction trial template (click + for code explanations) | |
|---|---|
- Every trial template must have a recognized
"type". In this case,"basic"(required). - Trial templates use the
"stimuli"definition to determine which stimuli to display on each trial (required). - Setting
"duration"to 10 ensures the stimulus remains on screen for 10 seconds before allowing participants to continue (optional, but recommended for instructions).
Now let’s define similar trial templates for the break and test instructions.
| The "PreTestBreak" instruction trial template (click + for code explanations) | |
|---|---|
- Every trial template must have a recognized
"type". In this case,"basic"(required). - Trial templates use the
"stimuli"definition to determine which stimuli to display on each trial (required). - Setting
"duration"to 30 ensures the stimulus remains on screen for 30 seconds before allowing participants to continue (optional, but recommended for instructions).
| The "T2" instruction trial template (click + for code explanations) | |
|---|---|
- Every trial template must have a recognized
"type". In this case,"basic"(required). - Trial templates use the
"stimuli"definition to determine which stimuli to display on each trial (required). - Setting
"duration"to 10 ensures the stimulus remains on screen for 10 seconds before allowing participants to continue (optional, but recommended for instructions).
Do not ignore the trailing comma
Since there are more trial templates to follow in this section, the comma after the closing brace } of each trial template is required. Omitting it will cause a syntax error.
Now, we can go ahead and copy and paste these trial templates into the code editor for "Trial Templates". It may complain about a syntax error for the last comma at the end of the third trial template, but that's okay, because we'll add more trial templates!
Training Trials
For the training trials, we create a template named "TrainingTrials". Since we need to present 8 word-pair stimuli in total, the trial template is set up to generate 8 unique trials, each of which presents two stimuli.
Trial Template vs Trials
This is the first time we define a trial template with multiple stimuli per trial. The "stimuli" field can be either a simple list or a nested list:
- If it’s a simple list of stimuli, each stimulus produces a single trial.
-
If it’s a nested list:
- Each inner list defines the set of stimuli shown together in a single trial.
- The outermost list controls how many trials are generated in total.
A single template can therefore create many trials automatically, each with a different set of stimuli but the same design (e.g., duration and delay). This prevents repetitive typing, ensures consistency, and makes it easy to apply more complex stimulus patterns if needed.
- Every trial template must have a recognized
"type". In this case,"basic"(required). - Trial templates use the
"stimuli"definition to determine how many trials to generate and which stimuli to display on each trial. This format generates 8 trials with 2 stimuli per trial (required). - The
"stimulus_pattern"property controls presentation settings. Setting"order"to"random"randomizes trial order (optional, defaults to"fixed"). - Setting
"duration"to 3 displays each stimulus for 3 seconds (optional). - Setting
"delay"to 1 adds a 1-second inter-trial interval (optional). - The
"responses"property lists responses to apply. An empty list means no responses are collected (optional).
Here, a simple per-participant randomization of the 8 trials is achieved by specifying the stimulus_pattern property. As in Craik and Tulving (1975), these stimuli will remain on the screen for 3 seconds each, achieved by the duration property. The delay property handles time between trials – here we set it to 1 to indicate a 1-second inter-trial-interval. We won’t collect any data from the participant in these training trials, so our responses property is set to an empty list [].
Test trials
Next, we create the trial templates for test trials. First, let’s handle the 2AFC test trials by making a trial template for YES-target trials and a second for NO-target trials. For 2AFC recognition, we present the question as a stimulus and pair the stimulus/question with a choice response. Like the training trials, the test trials will also be presented in a random order to minimize order effects between participants.
| The "TestTrials2AltY" trial template (click + for code explanations) | |
|---|---|
- Every trial template must have a recognized
"type". In this case,"basic"(required). - Trial templates use the
"stimuli"definition to determine how many trials to generate and which stimuli to display on each trial. This generates 4 trials with 1 stimulus per trial (required). - The
"stimulus_pattern"property controls presentation settings. Setting"order"to"random"randomizes trial order (optional, defaults to"fixed"). - The
"responses"property lists responses to apply to the trials. When one response is given, it applies to every trial (optional).
| The "TestTrials2AltN" trial template (click + for code explanations) | |
|---|---|
- Every trial template must have a recognized
"type". In this case,"basic"(required). - Trial templates use the
"stimuli"definition to determine how many trials to generate and which stimuli to display on each trial. This generates 4 trials with 1 stimulus per trial (required). - The
"stimulus_pattern"property controls presentation settings. Setting"order"to"random"randomizes trial order (optional, defaults to"fixed"). - The
"responses"property lists responses to apply to the trials. When one response is given, it applies to every trial (optional).
Advanced technique: Using response_pairing
For a challenge, you could combine TestTrials2AltY and TestTrials2AltN into a single trial template using the response_pairing feature. This assigns different responses to different stimuli within the same template. We're keeping them separate here to avoid complexity in this crash course, but check out the response_pairing documentation for details!
With our 2AFC test trials set, we just need to define the trial template for the free recall test trials.
| The "TestTrialsFree" trial template (click + for code explanations) | |
|---|---|
- Every trial template must have a recognized
"type". In this case,"basic"(required). - Trial templates use the
"stimuli"definition to determine how many trials to generate and which stimuli to display on each trial. This generates 4 trials with 1 stimulus per trial (required). - The
"stimulus_pattern"property controls presentation settings. Setting"order"to"random"randomizes trial order (optional, defaults to"fixed"). - The
"responses"property lists responses to apply to the trials. When one response is given, it applies to every trial (optional). - Note the lack of a comma here: this is our last trial template!
Randomization of all three test trials is achieved by specifying the stimulus_pattern property. Each test trial presents a stimulus/question randomly and collects a response using the specified responses property.
At this point, your full trial templates code should look like this (make sure the last trial template doesn't have a comma at the end of its definition!):
Creating the Procedure
Now it's time to put everything together into our procedure. We'll define a procedure with two blocks: a training block and a testing block. First, switch to the Procedure tab in the code editor:
The Procedure code editor tab.
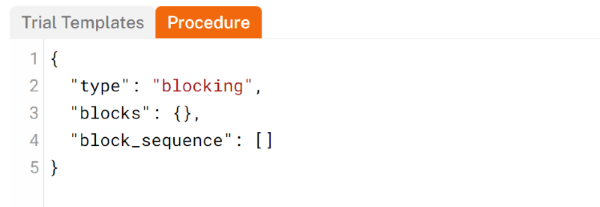
To begin, every procedure of a FindingFive study requires a "type", and for the time being, the type property always has the value "blocking", where trials are grouped into blocks that are put in a particular order. Blocking procedures also require blocks to be defined, and a block_sequence indicating how those blocks should be ordered:
| Initial procedure structure | |
|---|---|
The training block
Let's create our training block called TrainingBlock and add it to blocks:
| Procedure with "TrainingBlock" placeholder | |
|---|---|
A common block definition will include the following properties: the trial_templates that make up the main trials of the block and the pattern that should be used to order those trials within the block. Optionally, you can also add cover_trials that precede the main trials of the block, and end_trials that follow the main trials of the block.
Our training block starts with training instructions T1 as the only cover trial, presents the main training trials TrainingTrials in trial_templates, and ends with a break PreTestBreak as the only end trial. Since we're only using one template once, no pattern is needed.
| The "TrainingBlock" definition (click + for code explanations) | |
|---|---|
- Lists the trial templates which will be used to generate the main trials for this block (required).
- Lists trial templates to present before the main trials (optional).
- Lists trial templates to present after the main trials (optional).
The Testing Block
Our test block is similar, but uses three trial templates (TestTrials2AltY, TestTrials2AltN, TestTrialsFree) as defined in trial_templates. It starts with test instructions (T2) as the cover trial and uses a randomized_trials pattern to sample trials randomly from across all three trial templates. Taken together with the random stimulus_pattern used in each of these trial templates, the result is that trials from all three trial templates will be randomized and mixed together in this block.
| The "TestingBlock" definition (click + for code explanations) | |
|---|---|
- Lists the trial templates which will be used to generate the main trials for this block (required).
- The
"pattern"property controls how trials within the block are ordered. Here, trials from all templates are randomized together (optional). - Lists trial templates to present before the main trials (optional).
That's it! We just need two blocks for this mini experiment.
The Block Sequence
Finally, we specify the order in which the two blocks should appear:
| The "block_sequence" (click + for code explanations) | |
|---|---|
- All blocking procedures must define a
"block_sequence". This is a list of blocks to present in order. Note that the block sequence definition uses square brackets, not curly braces!
With that, here's what your complete procedure should look like:
- All procedures in FindingFive currently must be
"type": "blocking"(required). - This
"blocks"property takes a set of curly brackets{}as its value, with each block defined within the brackets (required). - All blocking procedures must define a
"block_sequence". This is a list of blocks to present in order (required).
Preview your study
Once you've built your study, preview it to ensure it runs correctly. Click the orange button with the symbol (it may also say "Preview" or "Preview Study") in the upper-right corner to test your experiment. You can preview the entire experiment or just a specific block—handy for debugging individual parts.
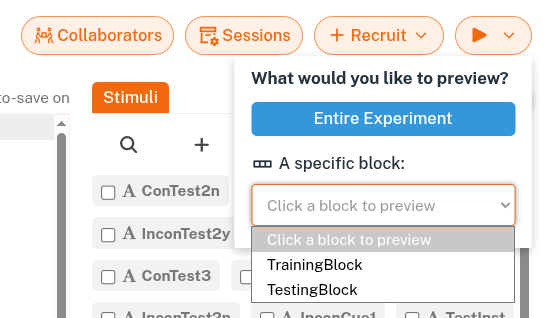
Previewing the entire experiment or a specific block.
Fixing Syntax Errors
As you type in the code editor, FindingFive checks for basic (JSON) syntax errors in real time—like missing commas, mismatched brackets, or incorrect quotation marks. If there's an error, the code editor will display a red indicator with a white x next to the line where the error occurs.
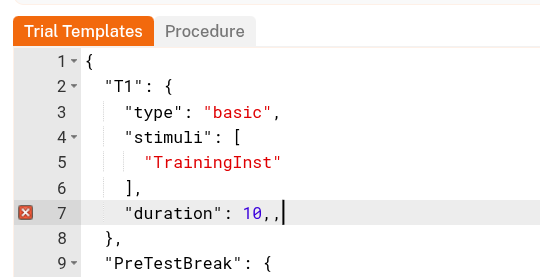
An example of a syntax error in the FindingFive code editor.
Common syntax errors
- Missing commas between items in a list
[]or a dictionary{} - An extra comma at the end of a list
[]or a dictionary{} - Use of single quotation marks
''instead of double quotation marks"" - Missing quotation marks
""where they are required - Mismatched quotation marks
"", list brackets[], or dictionary braces{}(e.g., quotes open without a corresponding closing quote)
You can learn more about formatting json here and fixing JSON syntax errors here.
Fix these basic errors first. Once you've resolved them, click Preview Study to check for deeper issues. Our study parser will aim to catch and explain them clearly:

An example of an error caught by our study parser.
Once your study previews successfully and you've reviewed the preview data, you're ready to recruit participants!
Next Steps
Congratulations on finishing the crash course! Be sure to check out the rest of the resources on this help hub that guide you through launching your study, recruiting and paying participants, and collecting data. While FindingFive has its own participant pool, you can also recruit through integrations with Prolific, Mechanical Turk, or even your own institutional pool—whichever best fits your needs. Once your study is complete, we compile your data into a long format .csv file that works seamlessly with R, Python, Excel, Numbers, and other analysis tools.
To get started, check out our Launching and Managing Sessions tutorial for step-by-step instructions on launching your study. You can also explore the Study Grammar documentation to learn more about how studies are structured on FindingFive. And if you have any questions, our researcher help team is always available at [email protected].