A Misinformation Memory Task
Written by Mandy Withall
Mandy Withall is a volunteer Research Scientist at FindingFive. They are currently pursuing their PhD degree at Northwestern University.
In this article, we will walk through an example of how a misinformation memory task can be built on FindingFive. Additionally, we provide code chunks that you can use to start building your own misinformation experiment!
Introduction
A common goal in misinformation research is to test participants’ memory for previously presented true and false information. Therefore, this article will model how to build a misinformation memory task. This task can be adapted to fit all kinds of research in the misinformation realm, including the Continued Influence Effect (e.g., Johnson & Seifert, 1994; Ecker et al., 2011), the Misinformation Effect (e.g., Loftus & Palmer, 1974; O’Donnell & Chan, 2023), the Illusory Truth Effect (Fazio et al., 2015; Pillai et al., 2023), and more.
Although this article will demonstrate text-based exposures to information and subsequent recall, FindingFive can present a wide range of stimuli to participants, including text, images, videos, and audio, and then measure other kinds of behavioral outcomes, such as decision-making and confidence ratings.
This article will guide you through creating three experimental phases that tend to exist in many misinformation memory tasks:

A typical three-part experiment design for misinformation studies.
- Exposure Phase: participants will be presented with true and false statements in text form.
- Distractor Task: participants will be presented with an intervening task to prevent them from rehearsing the statements.
- Recall Task: participants will be asked a question and will have to generate an answer.
The Exposure Phase
First, let's create the exposure phase. Our goal is to present participants with a series of true and false statements, one at a time. To help make sure that participants are reading carefully, we will ask them something about each statement as they go.
To help control for item effects we will employ a between-subjects design. One group of participants will see true versions of one half of our statements and false versions of the other half. The other group will see the inverse. We will use FindingFive's participant grouping feature to automatically assign participants to these two groups during recruitment (see detailes in Procedure below).
Creating Stimuli
Let's begin with our stimuli. We will use six distinct statements, each with a true version (in capital letters) and a false version (in lower case letters):
- The capital of France is PARIS/Marseille.
- Napoleon was born in CORSICA/Tahiti.
- A dried grape is called a RAISIN/prune.
- ‘Romeo and Juliet’ was written by WILLIAM SHAKESPEARE/Ben Jonson.
- The largest ocean on Earth is the PACIFIC/Atlantic.
- The U.S. Naval Academy is located in ANNAPOLIS/Washington.
We need to create the two versions of each statement separately, for a total of twelve stimuli. Let's create the first stimulus now. Give it the name true1, with the following definition:
| The "true1" Stimulus (click + for code explanations) | |
|---|---|
- All stimulus code must be encased between two curly brackets
{}(required). - Every stimulus must have a recognized
"type". In this case,"text"(required). - Every stimulus must include
"content". In this case, the true version of one of our six statements (required). - Setting
"alignment"to"center"ensures the statement is displayed in the center of the screen (optional, defaults to"left"). - Setting
"size"to"200%"doubles the font size from the default (optional).
Now that the first stimulus is created, you can duplicate it to create 11 additional copies. For each newly created copy, change its name to true2, true3, false1, false2, etc. and its"content" to one of the true/false versions of the statements given above. Try it yourself!
Spoiler! Example code for 'false1'
| The "false1" Stimulus (click + for code explanations) | |
|---|---|
- All stimulus code must be encased between two curly brackets
{}(required). - Every stimulus must have a recognized
"type". In this case,"text"(required). - Every stimulus must include
"content". In this case, the true version of one of our six statements (required). - Setting
"alignment"to"center"ensures the statement is displayed in the center of the screen (optional, defaults to"left"). - Setting
"size"to"200%"doubles the font size from the default (optional).
Spoiler! Example code for 'true2'
| The "true2" Stimulus (click + for code explanations) | |
|---|---|
- All stimulus code must be encased between two curly brackets
{}(required). - Every stimulus must have a recognized
"type". In this case,"text"(required). - Every stimulus must include
"content". In this case, the true version of one of our six statements (required). - Setting
"alignment"to"center"ensures the statement is displayed in the center of the screen (optional, defaults to"left"). - Setting
"size"to"200%"doubles the font size from the default (optional).
There, we have created all 12 stimuli for our statements!
Info
FindingFive also supports batch-uploading stimulus definitions via a CSV file.
Creating Responses
We need to ask participants something about each statement to ensure they are reading. Why don’t we include an interest rating bar after each statement?

The interest rating bar we will create for our exposure phase.
Let's create this response now. Give it the name interest_rating. The definition should look like this:
| The "interest_rating" Response (click + for code explanations) | |
|---|---|
- All response code must be encased between two curly brackets
{}(required). - Every response must have a recognized
"type". In this case,"rating"(required). - Many response types allow you to specify a custom
"instruction"(optional, defaults to“How confident are you in your response?"for rating responses). - Gives custom text labels to each point on the rating scale, each listed one at a time on lines 5–9, encased in brackets
[](optional, defaults to 1–5). - Setting
"delay"to 1.5 ensures that the response will not show up for 1.5 seconds, to give participants time to read (optional, defaults to0).
This same rating bar can be re-used for each trial, so that's it! Next, we’ll show you how to put these components together to make your trials.
Creating Trial Templates
Trial Templates organize stimuli and responses on a trial and display them to participants. A key concept of trial templates is that each template defines a group of trials of similar structure and function.
As noted above, we want to divide participants into two groups. One group will see true versions of the first three statements, and false versions of the last three statements. The other group will see the false versions of the first three statements and true versions of the last three statements. This will help to control for item effects and ensure that each participant sees all six statements only once, with three true and three false.
To do this, we will create two trial templates, one for each group. In the first trial template, statements 1–3 will be true, and statements 4–6 will be false. Let's create our first trial template now. Call it "trial_group_1":
| Trial template for the first exposure group (click + for code explanations) | |
|---|---|
- Each trial template is defined with its name (user-defined) as the property and its definition as the value, encased between two curly brackets
{}(required). - Every trial template must have a recognized
"type". In this case,"basic"(required). - Trial templates use the
“stimuli"definition to determine how many trials to generate and which stimuli to display on each trial. This format will generate 6 trials with 1 stimulus per trial (optional). - The
“stimulus_pattern"property controls various presentation settings for the trials generated by this template. In this case, setting“order"to“random"ensures a random presentation order of the trials (optional, defaults to“fixed"). - The
"responses"property lists responses to apply to the trials generated by this template. When only one response is given, it is applied to every trial (optional).
We can now create another trial template called "trial_group_2" laid out in exactly the same way but with the true/false versions of our stimuli flipped. Try it for yourself!
Spoiler! Code for 'trial_group_2'
| Trial template for the second exposure group (click + for code explanations) | |
|---|---|
- Each trial template is defined with its name (user-defined) as the property and its definition as the value, encased between two curly brackets
{}(required). - Every trial template must have a recognized
"type". In this case,"basic"(required). - Trial templates use the
“stimuli"definition to determine how many trials to generate and which stimuli to display on each trial. This format will generate 6 trials with 1 stimulus per trial (optional). - The
“stimulus_pattern"property controls various presentation settings for the trials generated by this template. In this case, setting“order"to“random"ensures a random presentation order of the trials (optional, defaults to“fixed"). - The
"responses"property lists responses to apply to the trials generated by this template. When only one response is given, it is applied to every trial (optional).
That's it! We have all the trial templates we need for the exposure phase of our demo study.
Creating the Procedure
The Procedure allows us to organize trial templates into Blocks and define the order in which to show those blocks to participants using the Block Sequence.
As mentioned earlier, we want to adopt a design where participants are randomly divided into two exposure groups, where each group is shown a different set of statement versions to control for item effects in this experiment. This design can be achieved easily on FindingFive, and the platform will even take care of randomization for you.
To do this, we will create two distinct exposure blocks, one for each group. Each block will use a different trial template to generate its trials. We then use the participant grouping syntax in the block sequence to divide our participants into two groups and assign a different block to each group. Here's what that looks like:
- All procedures in FindingFive currently must be
"type": “blocking"(required). - This
"blocks"property takes a set of curly brackets{}as its value, with each block defined within the brackets (required). - Each block is defined with its name (user-defined) as the property and its definition as the value, encased between two curly brackets
{}(required). - Lists the trial templates which will be used to generate trials for this block. Notice that we included our trial template for the first exposure group, encased in square brackets
[](required). - Each block is defined with its name (user-defined) as the property and its definition as the value, encased between two curly brackets
{}(required). - Lists the trial templates which will be used to generate trials for this block. Notice that we included our trial template for the second exposure group, encased in square brackets
[](required). - All blocking procedures must define a
"block_sequence". In its most basic form, this is a list of blocks to present in order (required). - Participant groups are defined within a set of curly brackets
{}. Each group is defined with its name (user-defined) as the property and its own internal block sequence as the value, encased within square brackets[].
Now is a good time to preview your experiment to test it out. It should look something like this:
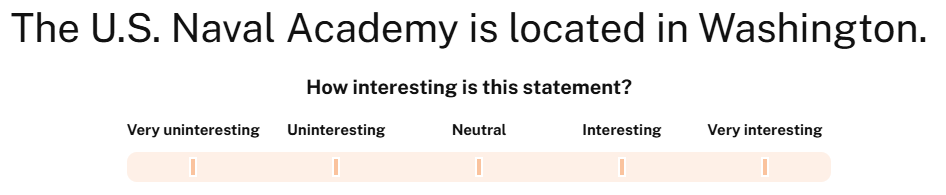
A sample trial from our exposure phase.
And with that, you’ve built the exposure phase of our misinformation memory task! Congratulations!
The Distractor Task
Our next step in creating the misinformation memory task is to add a distractor task. Our goal is to use some simple math problems to distract participants and keep them from thinking about the statements they just saw during the exposure phase. To this end, we will create four trials, each including a math problem with a multiple choice response.
Creating Stimuli
First, let's create our four distractor stimuli, where each stimulus displays a simple multiplication question:
- "What is 3 x 3?"
- "What is 4 x 4?"
- "What is 5 x 5?"
- "What is 6 x 6?"
Let's create the first stimulus now. Give it the name 3x3_distractor. Try it for yourself!
Spoiler! Code for ''3x3_distractor''
| The "3x3_distractor" stimulus (click + for code explanations) | |
|---|---|
- All stimulus code must be encased between two curly brackets
{}(required). - Every stimulus must have a recognized
"type". In this case,"text"(required). - Every stimulus must include
"content". In this case, one of our math questions (required). - Setting
"alignment"to"center"ensures the statement is displayed in the center of the screen (optional, defaults to"left"). - Setting
"size"to"200%"doubles the font size from the default (optional).
Create additional stimuli for our remaining three math questions, naming them "4x4_distractor", "5x5_distractor", and "6x6_distractor". Don't forget to update the content of the question as well!
Creating Responses
Each of the above math problems has a different solution, so we need to create four responses that match each of the four distractor stimuli. We will use the choice response type to give participants a four-alternative forced choice (4AFC) response. Let's create the first response now. Give it the name "3x3_answer":
| The "3x3_answer" response (click + for code explanations) | |
|---|---|
- All response code must be encased between two curly brackets
{}(required). - Every response must have a recognized
"type". In this case,"choice"(required). - The
"choices"property is specific to the"choice"response type and lists the response options that participants must choose from, encased in square brackets[]. Note that we have included four options on lines 4–7 (required). - Setting a
"target"identifies a "correct" answer to the question for automatic reporting of correct/incorrect responses in your data (optional). - Setting
"size"to"200%"doubles the font size from the default (optional).
Go ahead and create the remaining three responses ("4x4_answer", "5x5_answer", and "6x6_answer") on your own.
Info
You can either use the duplicate response feature, or create them manually by modifying the sample response above. Remember to update the "choices" and "target" properties for each response.
Adding Trial Templates
Now, we want to add a new trial template for the distractor task. We’re going to add on to the trial template code that we already have by adding a new template called "trial_distractor":
- Trial templates defined earlier for the exposure phase are shown for reference, with their definitions omitted for brevity. Do not remove their definitions from your own code.
- Each trial template is defined with its name (user-defined) as the property and its definition as the value, encased between two curly brackets
{}(required). - Every trial template must have a recognized
"type". In this case,"basic"(required). - Trial templates use the
“stimuli"definition to determine how many trials to generate and which stimuli to display on each trial. This format will generate 4 trials with 1 stimulus per trial (optional). - The
“stimulus_pattern"property controls various presentation settings for the trials generated by this template. In this case, setting“order"to“random"ensures a random presentation order of the trials (optional, defaults to“fixed"). - The
"responses"property lists responses to apply to the trials generated by this template. In this case, each response is mapped onto a stimulus in rotating fashion. For this reason, it is important that the stimuli and responses be defined in the same order (optional).
Info
FindingFive uses intelligent defaults to interpret your intentions. Here, one response is assigned to each stimulus in order, cycling through all stimuli and responses. Alternative configurations are also possible—see the Study Grammar for more information.
Updating the Procedure
Last, we want to update the procedure, both to include a distractor task block and to add it to the block sequence. Importantly, the distractor block will be seen by both exposure groups, which can be easily achieved with an edit to the block sequence:
- All procedures in FindingFive currently must be
"type": “blocking"(required). - This
"blocks"property takes a set of curly brackets{}as its value, with each block defined within the brackets (required). - Blocks defined for the exposure phase are included here for reference, but their definitions are omitted for brevity. Do not remove these block definitions from your own code.
- Each block is defined with its name (user-defined) as the property and its definition as the value, encased between two curly brackets
{}(required). - Lists the trial templates which will be used to generate trials for this block. Notice that we included our trial template for the distractor task, encased in square brackets
[](required). - All blocking procedures must define a
"block_sequence". In its most basic form, this is a list of blocks to present in order (required). - Participant groups are defined within a set of curly brackets
{}. Each group is defined with its name (user-defined) as the property and its own internal block sequence as the value, encased within square brackets[]. - Our new
"block_distractor"is appended to the end of the block sequence, outside of the curly brackets{}defining the participant groups. This ensures that all groups will receive this block.
Now, you can preview this specific block to test it out! It should look something like this:

A sample trial from our distractor task.
Great job creating the distractor task!
The Recall Task
Time for the final phase of our misinformation memory task: the recall task. Our goal here is to test participant recall for the statements presented during the exposure phase.
To do this, we will pose questions targeting the words that differ across our true/false statement variations. For each question, we will include a free response text box for participants to type in an answer using the text response type.
Creating Stimuli
For this recall task, we need six recall stimuli that match our six exposure stimuli:
- What is the capital of France?
- Where was Napoleon born?
- What is a dried grape called?
- Who wrote 'Romeo and Juliet'?
- What is the largest ocean on Earth?
- Where is the U.S. Naval Academy located?
You can do it!
Try creating these recall stimuli by duplicating and then modifying the stimuli from the Exposure Phase. Name these stimuli "recall1", "recall2", and so on.
Spoiler! Sample code for ''recall1''
| The "recall1" stimulus (click + for code explanations) | |
|---|---|
- All stimulus code must be encased between two curly brackets
{}(required). - Every stimulus must have a recognized
"type". In this case,"text"(required). - Every stimulus must include
"content". In this case, one of our recall questions (required). - Setting
"alignment"to"center"ensures the statement is displayed in the center of the screen (optional, defaults to"left"). - Setting
"size"to"200%"doubles the font size from the default (optional).
Creating Responses
For each recall trial, we want to display a text box to collect a free response from participants. Let's create this response now. Give it the name recall_response. The definition should be as follows:
| The "recall_response" (click + for code explanations) | |
|---|---|
- All response code must be encased between two curly brackets
{}(required). - Every response must have a recognized
"type". In this case,"text"(required). - Setting
"required"totruemeans that participants must input text before they can advance to the next trial (optional, defaults tofalse).
Updating Trial Templates
It's time to add another trial template for the recall task. The stimuli will be our recall questions and our response will be our text response.
- Trial templates defined earlier are included here for reference, but their definitions are omitted for brevity. Do not remove the definitions from your own code.
- Each trial template is defined with its name (user-defined) as the property and its definition as the value, encased between two curly brackets
{}(required). - Every trial template must have a recognized
"type". In this case,"basic"(required). - Trial templates use the
“stimuli"definition to determine how many trials to generate and which stimuli to display on each trial. This format will generate 6 trials with 1 stimulus per trial (optional). - The
“stimulus_pattern"property controls various presentation settings for the trials generated by this template. In this case, setting“order"to“random"ensures a random presentation order of the trials (optional, defaults to“fixed"). - The
"responses"property lists responses to apply to the trials generated by this template. When only one response is given, it is applied to every trial (optional).
Updating the Procedure
Finally, we must update the procedure to include a block for our recall task and include it in the block sequence for all participants.
- All procedures in FindingFive currently must be
"type": “blocking"(required). - This
"blocks"property takes a set of curly brackets{}as its value, with each block defined within the brackets (required). - Lines 4–12 represent blocks defines for the exposure and distractor phases of the study.
- Each block is defined with its name (user-defined) as the property and its definition as the value, encased between two curly brackets
{}(required). - Lists the trial templates which will be used to generate trials for this block. Notice that we included our trial template for the recall task, encased in square brackets
[](required). - All blocking procedures must define a
"block_sequence". In its most basic form, this is a list of blocks to present in order (required). - Participant groups are defined within a set of curly brackets
{}. Each group is defined with its name (user-defined) as the property and its own internal block sequence as the value, encased within square brackets[]. - This block was added for the distractor task. Its existince outside of the curly brackets
{}defining the participant groups ensures that all groups will receive this block. - Our new
"block_recall"is appended to the end of the block sequence, outside of the curly brackets{}defining the participant groups. This ensures that all groups will receive this block.
When you’re done, you can preview this specific block to test it out! It should look something like this:

A sample trial from our recall task.
And just like that, you’ve created your very own Misinformation Memory Task on FindingFive. Amazing!
Preview the Experiment
You can now preview the experiment by clicking on the “Preview" button above the stimuli section of the study editor. You can then choose to preview the entire experiment, or select individual blocks to preview in isolation. You can even download your own data at the end of the preview. If you notice anything that needs adjusting, make the changes to your study code and preview again—FindingFive gives you unlimited free previews of all your studies!
Conclusion
With this base, you can adapt your experiment to include all kinds of things. For example, it is possible to generate recognition tasks rather than recall tasks. Or, you may want to include instructions, demographics, or practice trials. Or even still, you may want to present statements one word at a time, or for precise amounts of time. All of these conditions are possible using FindingFive’s Study Grammar.
Next Steps
Have you finished creating your study? Do you feel stuck on what to do next? FindingFive is here to help!
At FindingFive, we have all kinds of resources at your disposal to help you launch your study, find and pay participants, and collect data. Although FindingFive has its own participant base, we also have integrations with Mechanical Turk, Prolific, and your own institutional pool to help you utilize whatever participant pool fits your needs.
After you’ve collected data, FindingFive compiles it for you into an easy-to-read .csv file that can be opened in R, Python, Excel, Numbers, and more to facilitate easy analysis.