Integrate FindingFive with Mechanical Turk
Written by the FindingFive Team
FindingFive works seamlessly with Amazon Mechanical Turk (MTurk), making it easy to both create your experiments and launch them as HITs (a task unit on MTurk) directly from FindingFive. In addition, MTurk "workers" (participants recruited through MTurk) do not need to create FindingFive accounts to complete your study. Instead, FindingFive will embed your study directly on MTurk as a HIT, making access easy for participants.
Since the overall quality of the participant pool on Mechanical Turk has been suboptimal in recent years, be sure to check out our post detailing some best practices when running a study on Mechanical Turk!
Start early! It could take up to 3 weeks before you can recruit MTurk workers
Due to a known issue with the default credit limit for AWS Billing, you should expect it to take 1–3 weeks before you will be able to use the integration to recruit MTurk workers. However, you will be able to test your experiments with sandbox HITs much earlier. As such, we recommend starting this process well before you need to recruit.
Overview
Processes have changed since 2023
Even if you have already completed some of these steps—for instance, you may already have an AWS account—we still recommend reading through this tutorial entirely to understand the necessary steps.
Setting up your MTurk account to integrate with FindingFive requires the following 3 steps:
- Create AWS and MTurk Accounts: Create an AWS account and set up both sandbox and production MTurk Requester accounts.
- Authorize FindingFive as an IAM User: Use AWS's Identity and Access Management (IAM) features to create an IAM user with necessary permissions. Obtain access keys for that IAM user and input them into your FindingFive profile under MTurk Integration settings. This will allow FindingFive to manage MTurk HITs on your behalf.
- Set Up AWS Billing: Add a payment method to your AWS account and request an increase in the MTurk credit limit via AWS support. This request may take 1–3 weeks to be processed and approved by AWS.
Step 1: Create Amazon Web Services and Mechanical Turk Accounts
Create an AWS Account
Amazon Mechanical Turk is now officially part of Amazon Web Services (AWS). As a result, you now need an AWS account in order to use MTurk. Go to Amazon Web Services and click on "Create account" in the upper-right corner.
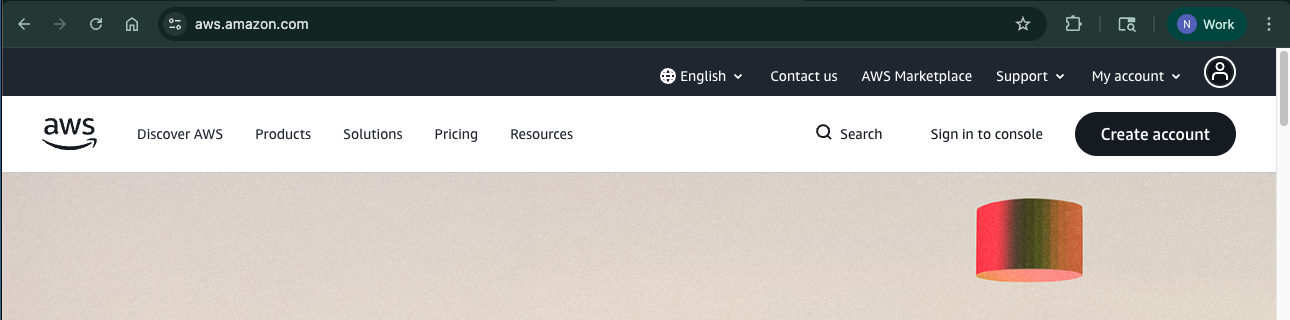
On the next page, you will be prompted to sign up for AWS.
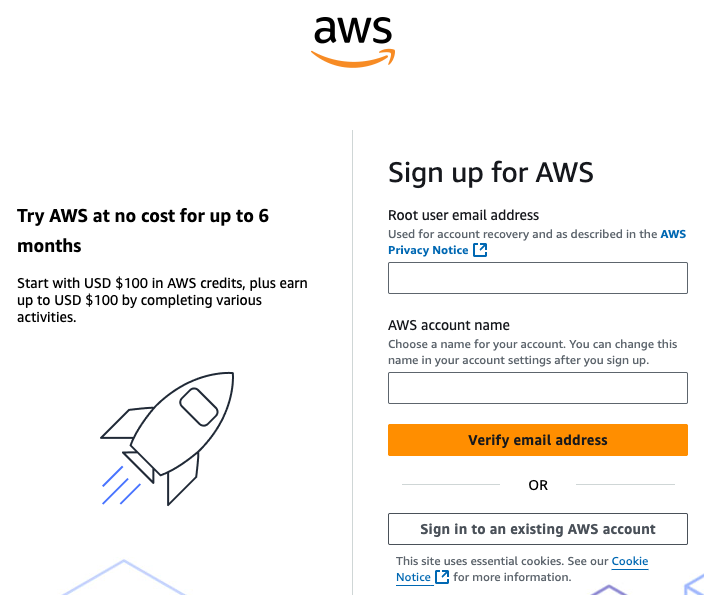
Avoid using a previous MTurk-linked email
If you already have an email that you used to sign up for MTurk without AWS, please do not use that email address for signing up with AWS. AWS may let you do it, but their system does not account for this scenario. As a result, you may get locked out during the next step of linking AWS to your MTurk requester account.
Follow the on-screen instructions to create an AWS account. This account is called an AWS "root" account. AWS will try to warn you that using a root account is dangerous. In a software development context, such a concern is valid in order to limit excessive permissions. But for running research studies for a single research lab, using the root account is completely fine, especially since you will set up a limited IAM user for use with FindingFive.
FindingFive will not have access to your AWS root account
FindingFive does not interact directly with your AWS account. Instead, you will set up what is called an Identity and Access Management (IAM) user in Step 2, allowing FindingFive to interact with your MTurk Requester accounts only.
Create MTurk Requester Accounts
Mechanical Turk requires separate accounts for running "sandbox" versus "production" HITs. Sandbox HITs allow you to participate in your own HITs on MTurk to verify that they work as intended. Production HITs are for recruiting real MTurk workers (participants). We recommend setting up both MTurk Requester accounts at this time.
Create a MTurk Requester (sandbox) account
We'll sign up for the "sandbox" requester account first. This account will have a permanent account balance of $10,000—isn't that nice? To get started, go to the MTurk Requester (sandbox) sign in page, which should look like this:
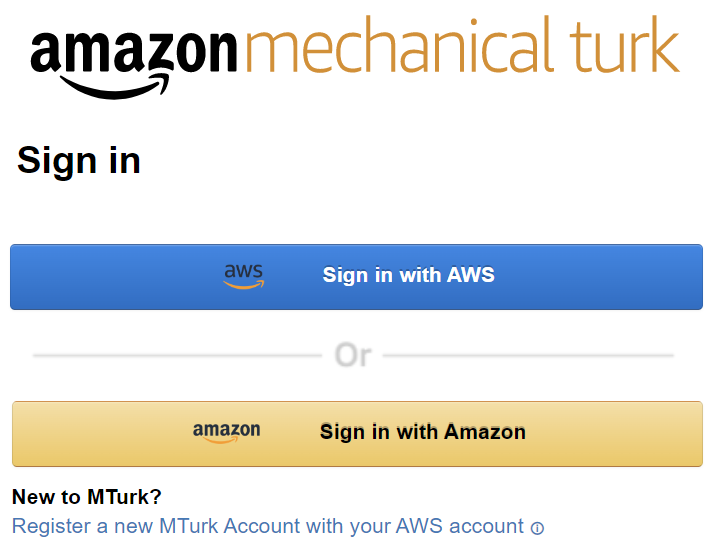
Use the "Sign in with AWS" option to sign in using the AWS account you just created. Once you sign in, MTurk may ask if you already have an account with MTurk. We advise you not to use a pre-existing MTurk account here as the process is unreliable and may result in you getting locked out. Instead, confirm the creation of a new MTurk account using your AWS account information.

About the "Sign in with existing account" option
If you have a grandfathered MTurk account that is not an AWS account, we advise against trying the "Sign in with existing account" button as shown in the screenshot above, even if that account still contains funds. Unfortunately, that process is notoriously unreliable and may not work. If you are unlucky like Ting, our president, your old MTurk account may become completely locked out after following through the migration process. Just starting a new AWS account from scratch is the much safer approach.
Creat a MTurk Requester (production) account
To actually recruit participants, you'll need a separate account for the "production" MTurk Requester site. The process should be identical to what we just did with the sandbox mode, except for the slightly different URL.
We won't use the production account in this tutorial, but consider setting it up anyway.
Although we won't need to use the production version in the rest of this tutorial (because we won't recruit real participants), we recommend creating your production Requester account now. This will allow you to request an override of MTurk's absurd $0.02 credit limit after you set up AWS billing in Step 3, a process which could take up to 3 weeks.
Step 2: Authorize FindingFive as an IAM User
Create a new Identity and Account Management (IAM) user
Now that you have your AWS root account and MTurk Requester accounts, it's time to add FindingFive as a new IAM user to your account. Creating an IAM user will generate access keys specific to that user, which allow FindingFive to do all the behind-the-scenes work for you on MTurk (for both sandbox & production versions). This also ensures FindingFive can only act as a limited "user" within your AWS resources instead of obtaining complete access to your AWS root account.
Protect your AWS root account
You may notice that without doing anything, there may already be a "root key" associated with your account (especially if your AWS account was created a while ago). Please make sure you DO NOT give us (or any third-parties) the root key. The root key will allow others to make unrestricted changes to your AWS account, incurring charges and fees for services you did not sign up for.
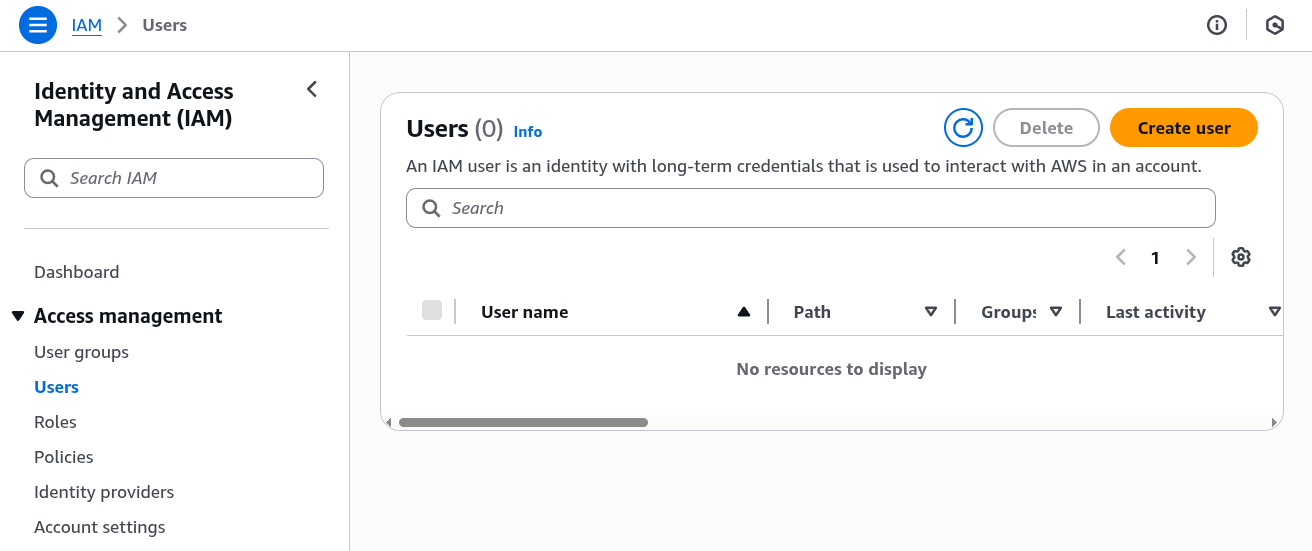
To set up an IAM user, visit Identity and Access Management (IAM). Once there, click on "Users" under the "Access management" list located in the left-hand menu. This should bring you to the page shown in the screenshot below. Click the orange "Create user" button on the right-hand side of the page to start creating an IAM user.
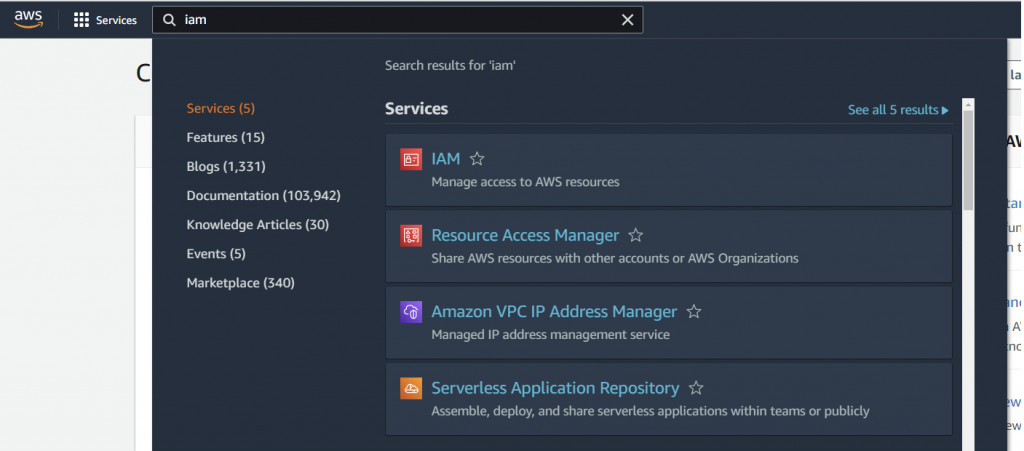
Link not working? Search for IAM from AWS
When logged into your AWS account, you should see a search bar at the top of the screen. Type "IAM" into the search bar and choose "IAM" from the search results (it should be the first option).
Name the IAM user
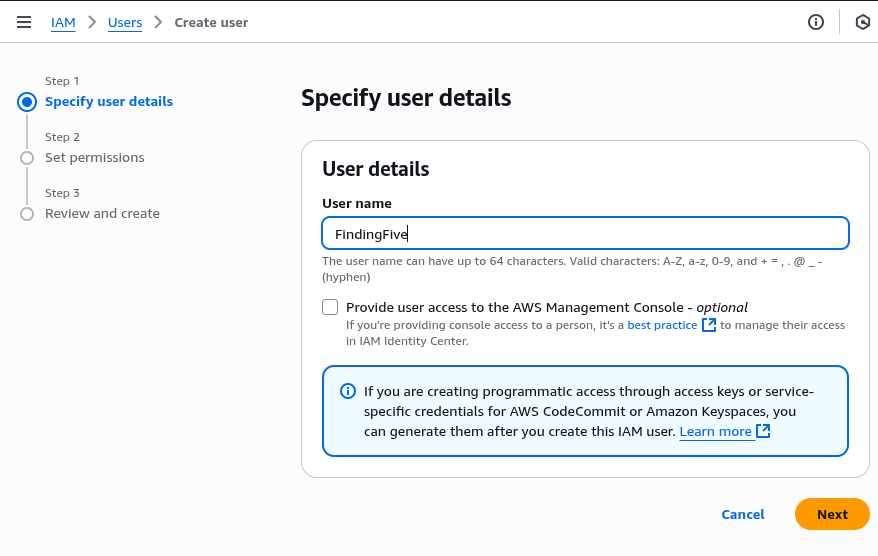
First, you must name the IAM user. We recommend using just "FindingFive", since we will be the authorized user and this will make it easy to identify. The "Provide user access to the AWS Management Console" option should be unchecked by default—leave it unchecked. Click "Next" when you are ready.
Set permissions
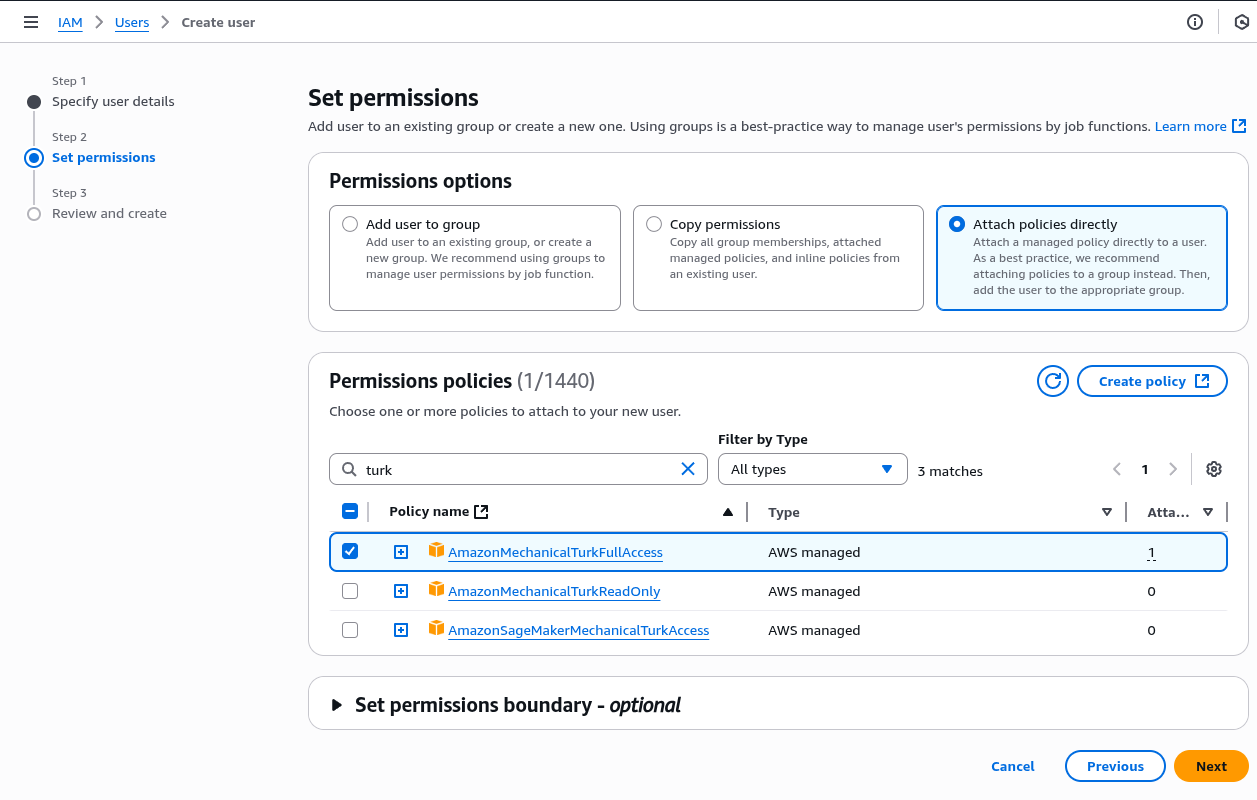
The next thing to configure is permissions for this IAM user. We'll choose "Attach policies directly", and then in the policies shown below, search for "turk". There should be three related policies as shown in the screenshot below. We just need to check the "AmazonMechanicalTurkFullAccess" permission. Click "Next" when you are ready.
Review and create
The next step should just display a summary of the new IAM user to be created. Importantly, please make sure that the "Permissions summary" panel includes the MTurk full access permission we chose in the previous step. If everything looks good, click "Create User". You should be brought back to the Users page we were on just before, and your new "FindingFive" user should be listed there.
Create Access Keys
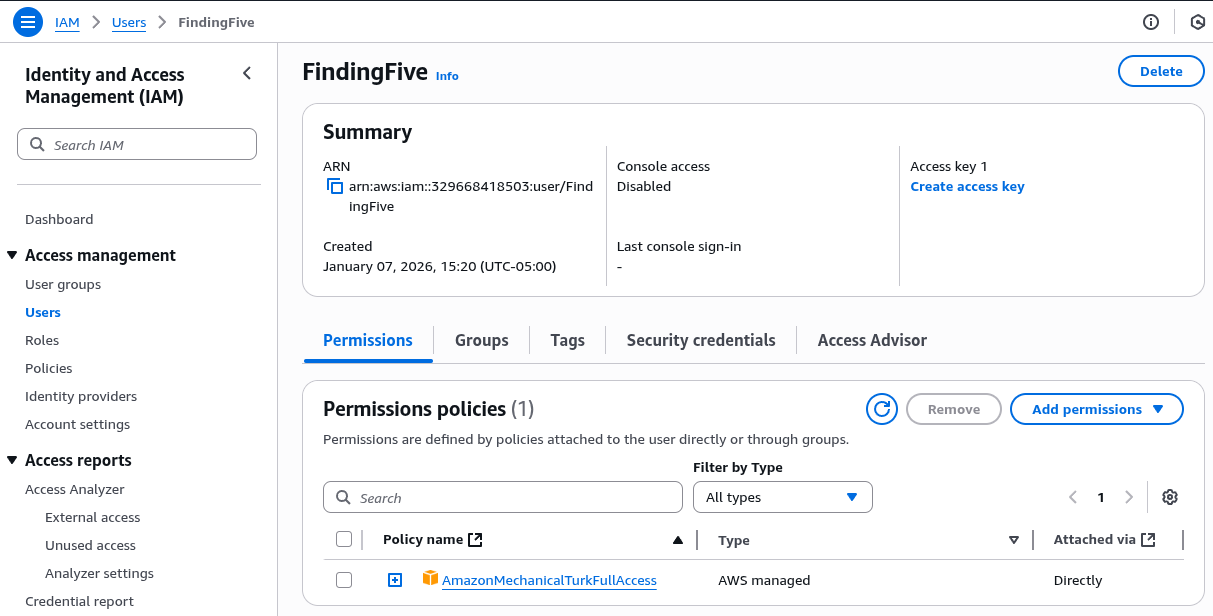
Finally, let's click this new "FindingFive" user to generate a pair of access credentials to use on FindingFive. You'll see a page similar to the screenshot below—click the Create access key link just below the "delete" button in the top right corner.
AWS will ask you for the "use case" and attempt to advise you on best practices. For integration with FindingFive, you can either choose "third-party services" and get an earful or just "others" for simplicity. In either case, this is just an informational step and does not have an effect on creating the keys. Click "Next" to enter optional tags (you don't have to add any) and "Next" again to see the keys.
Do not click the "Done" button just yet!
Read the next step first!
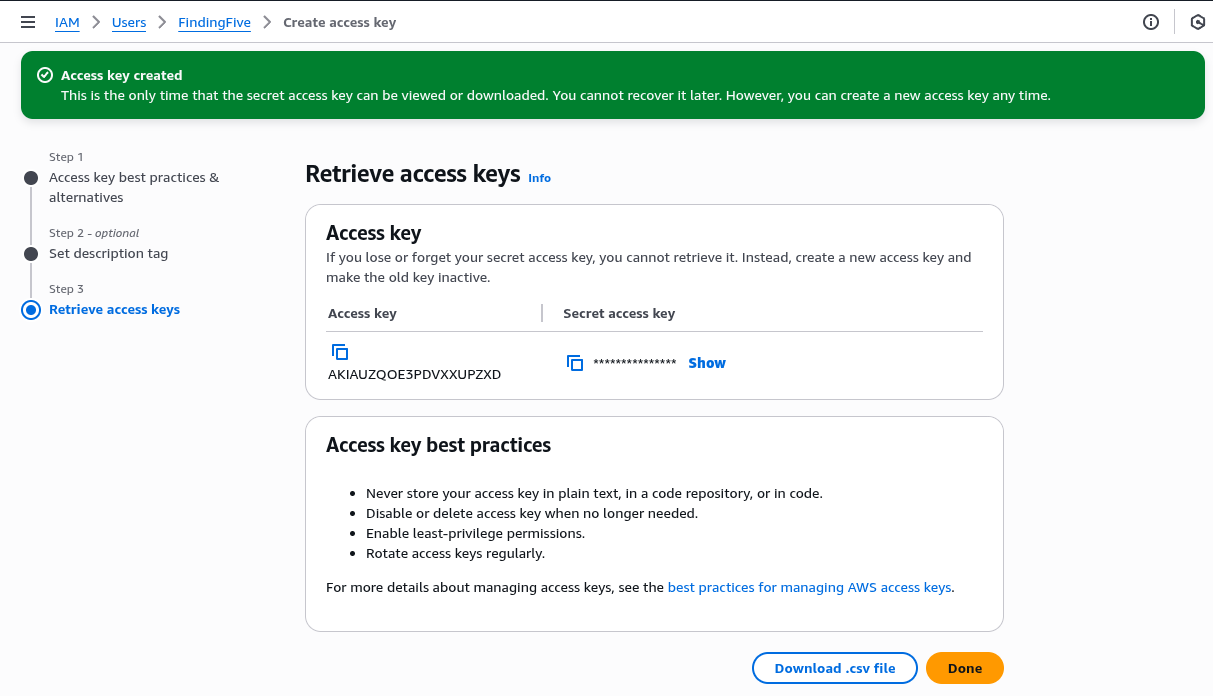
Save these keys NOW!
The access credentials should now be shown on your screen like the screenshot below. This is the ONLY TIME you can access these credentials and FindingFive needs these keys to link up with MTurk. So please save these keys somewhere safe now so that you can retrieve them later!
Seriously, do it now. Otherwise you'll have to repeat the whole process of creating another IAM user to generate new credentials.
Enter your IAM access keys on FindingFive
Okay, it's finally time for the first (and only) part of this process that takes place on FindingFive! Now that you have an IAM user authorized to access MTurk features for your AWS account, you'll need to tell FindingFive the access keys so that we can act as this IAM user.
First, go to your profile by clicking on your name at top right of your screen and selecting "Account Settings". Click "MTurk Integration" on the top navigation menu and enter your IAM user's access and secret keys.
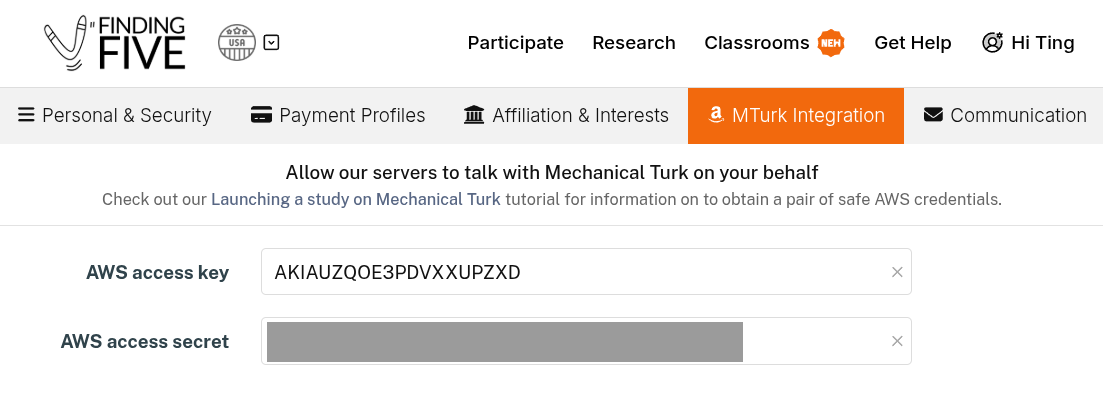
Click "Save changes" at the bottom. At this point, you will be able to launch sandbox HITs on Amazon Mechanical Turk directly from FindingFive! However, you will not yet be able to launch production HITs recruiting actual participants. To do that, you'll need to set up AWS Billing in the next step.
Step 3: Set Up AWS Billing
If you used Mechanical Turk prior to 2023, you may remember all you needed to do was preload your MTurk account with a sufficient balance, and everything would be ready to go! If your balance ran low, you'd just need to add more money to your account. In fact, FindingFive has built-in integration that checks your account balance for you before you launch an MTurk-based session.
In late 2023, however, Amazon removed the account balance feature in MTurk and asks everyone to use AWS billing instead. In this step, we will walk you through setting up AWS billing so that you can run production HITs.
Believe it or not, this process can take up to 3 weeks!
Even though researchers are asked to enter credit card information into AWS to enable "AWS billing" for MTurk, AWS has set the "preauthorized credit limit" for running HITs at $0.02 USD. That's right, 2 cents! As a result, no researchers can launch HITs at all because it's impossible to set up an experiment with a 2 cent budget. It's truly mind-boggling.
But don't worry! We will provide you with the necessary form so that you can contact Amazon to request an increase of this credit limit. However, it may take some time for them to approve your request, so be prepared to wait.
Add a Payment Method to enable AWS Billing
We need to first add a credit card to your AWS account. This is the easy part: just go to the Payment Preferences page of AWS (you may need to log in first if you haven't already), and follow on-screen instructions to add a new payment method.
Once you have done so, go to your MTurk Requester account to check if the "Billing details" has been updated (this may take up to a few hours). It should say "Your account is configured to pay using AWS billing." If not, follow on-screen instructions to try recommended remedies.
Request an Increase to Your Credit Limit
Here comes the fun part: we now need to reach out to AWS customer service to complain and request an increase of your MTurk account's credit limit. Please use this link to submit a ticket to Mechanical Turk support. For the "Problem Type" field, select "Requester". For "How can we assist you today?", feel free to adapt the following message to your own preference (please remember to replace XXXXX with your actual AWS account number):
Subject: Request to Increase MTurk Credit Limit for AWS Account XXXXXX
Dear AWS Support Team,
I am a researcher using Amazon Mechanical Turk for academic studies. My account has been configured to use AWS billing, but the default preauthorized credit limit of $0.02 USD is insufficient for running any HITs. Please increase my credit limit to $2000 USD to allow for charges necessary to run my studies.
Thank you for your assistance.
In our experience, AWS will get back to you in 1-3 weeks and generally approve the limit. They will generally communicate with you via the email address you used to sign up for AWS.
Next Steps
Congratulations on finishing this tutorial! Integration with Mechanical Turk has evolved to be ever more complex over the years, so please congratulate yourself on completing this task! Be sure to check out the rest of the resources on this help hub that guide you through launching your study, recruiting and paying participants, and collecting data. If you have any questions, our researcher help team is always available at [email protected].